Learn
Preparing and Testing DNA Samples
Testing DNA Samples
After biological samples are collected at a crime scene, they are sent to a laboratory with dedicated facilities and equipment that meet the FBI’s quality assurance standards (QAS); most of these labs are part of state or regional law enforcement agencies.
Prior to performing DNA analysis, initial testing (discussed in a previous lesson) is often done to determine what type of biological materials present. To determine who deposited the biological material at the crime scene, the DNA from the samples must be tested.
Forensic Biology DNA Unit
In most cases, DNA samples submitted undergo testing as shown in the video below. Watch Inside the Crime Lab: Forensic Biology DNA Unit from 1:53 to end.
Open Inside the Crime Lab: Forensic Biology DNA Unit in a new window
Note: The presentation may take a moment to load.
Polymerase Chain Reaction
Sometimes only a drop of blood blood is available for DNA analysis. Polymerase chain reaction (PCR) can be used to make multiple copies of DNA so a larger sample can be used to run numerous tests. Remember, scientists run experiments many times to make sure no errors have occurred. Forensic scientists are no different. DNA experiments are completed several times before the results are presented to a jury.
Before analyzing DNA, scientists must first break open the cell to release the DNA, cut the DNA (with restriction enzymes) into smaller fragments, sort the DNA fragments, and then analyze the results.
DNA Analysis Steps
Let us look a bit more closely at each of these steps.
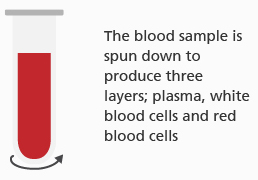
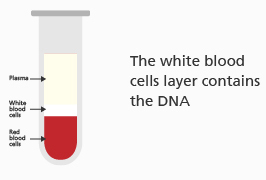
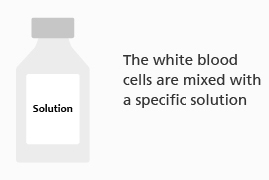
- Extraction - DNA is released from the cells using a detergent that disrupts the plasma membrane. Proteins and RNA are separated and removed, and DNA is concentrated to the base of the tube using a centrifuge.
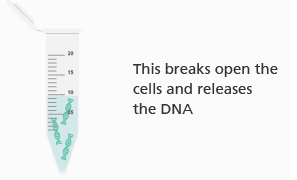
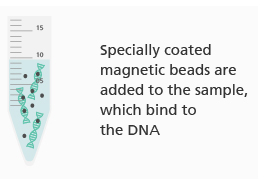
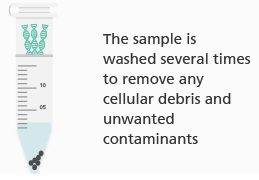
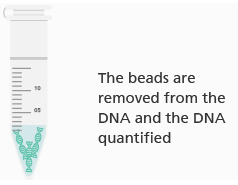
"The process of DNA extraction" by Genomics Education Programme is licensed under CC BY 2.0.
- Quantification - The amount of DNA present is determined. This can be done by determining the absorption of light when shined through the sample. Nucleic acids typically absorb light that is 260 nm in length. The greater the absorption, the higher the concentration within the sample.
- Amplification - Millions of copies of the DNA are produced using a process known as polymerase chain reaction (PCR). During this process, samples of DNA are heated, which causes the strands to denature and separate. As the sample cools, an enzyme (DNA polymerase) attaches and makes copies of the DNA. The process of heating, cooling, and copying repeats until enough DNA is copied for the necessary tests.
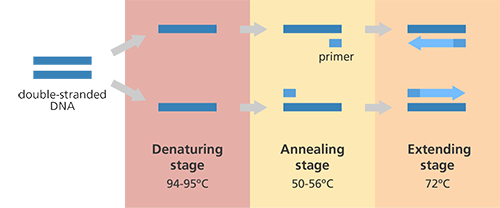
"Illustration showing the main steps in the polymerase chain reaction (PCR)" by Genome Research Limited is licensed under CC BY 4.0. - Separation and Analysis - Because of small differences in DNA sequences between individuals, the DNA produced through PCR will have varying lengths between individuals. Scientists can separate these segments based on size, creating a unique DNA fingerprint or profile.
DNA from Collection to Results
Follow this DNA from collection to results:
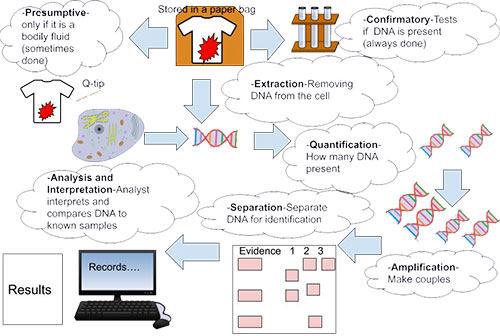
- The DNA sample is stored in a paper bag.
- Presumptive Test - performed only if the DNA sample is a bodily fluid.
- Confirmatory Test - is always performed if DNA is present.
- Extraction - removing DNA from a cell.
- Quantification - how many DNA present.
- Amplification - making copies of the DNA.
- Separation - separating the DNA for identification.
- Analysis and Interpretation - an analyst interprets and compares DNA to known samples.
- Results
Knowledge Check #1
Arrange the steps of DNA testing into the correct order.
- Make copies of the DNA.
- Determine how much DNA is present.
- Break open the cell to release the DNA.
- Analyze the results.
- Separate DNA based on the size of the fragments.
Answer:
- Break open the cell to release the DNA.
- Determine how much DNA is present.
- Make copies of the DNA.
- Separate DNA based on the size of the fragments.
- Analyze the results.
Knowledge Check #2
PCR is used in which step of the process?
- separation
- quantification
- amplification
- interpretation
Answer: c. amplification
Knowledge Check #3
During which step of the process is DNA separated from proteins and RNA in the sample?
- extraction
- separation
- interpretation
- quantification
Answer: a. extraction
Knowledge Check #4
- Amplification; the light helps to multiple the DNA.
- Quantification; the amount of light absorbed indicates the concentration of DNA in the sample.
- Extraction; the light causes the cells to break apart and release DNA.
- Interpretation; the light allows analyst to differentiate between DNA from different sources.
Answer: b. Quantification; the amount of light absorbed indicates the concentration of DNA in the sample.