Soil Lab
Scenario
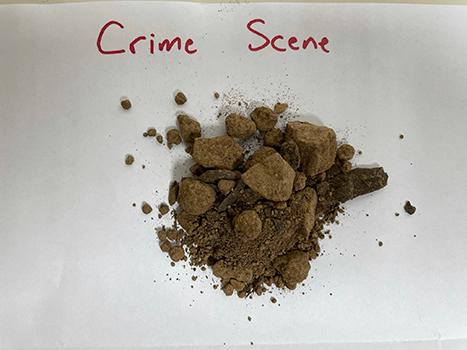
The Crime
Anthony was working late at a construction site. As he was finishing his work, a strange man approached the site and grabbed a bag of tools. Anthony approached him and asked him to drop it. The man grabbed a hammer from the bag and struck Anthony in the head, then struck him several more times after Anthony had fallen to the ground.
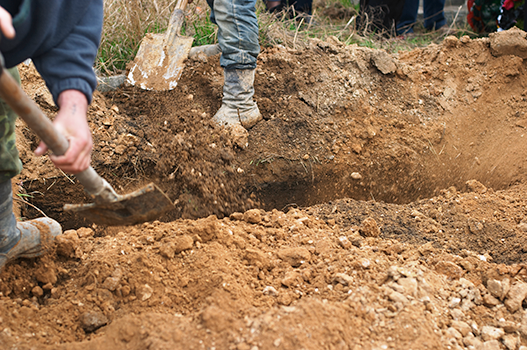
The attacker fled with the tools through the muddy site before driving off. A coworker found Anthony, unconscious and badly hurt, several minutes later.
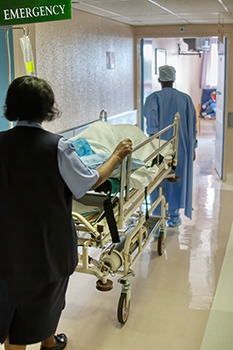
The Victim
Anthony is still in the hospital in intensive care.
The police are unable to question him.
The Evidence
The suspect did not leave any evidence at the scene. By the time the police had arrived, Anthony’s coworkers had accidentally destroyed impression evidence, like footprints or tire prints.
However, the construction company did have a surveillance camera.
Based on the muddy conditions, the police also collected a soil sample.
The Suspects
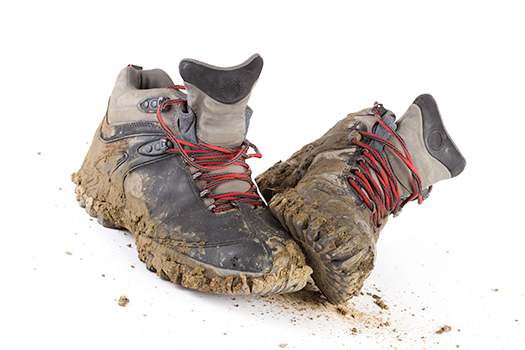
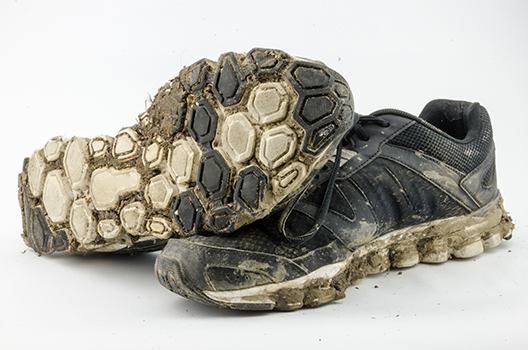
Using the surveillance camera footage, police were able to partially read a license plate number. Based on this, they have five potential suspects. They also noted that several suspects’ shoes were very muddy, so they took soil samples from the suspects’ shoes.
The Forensic Lab
As the soil lab technician, you received the soil samples collected by the police - one sample from the scene of the crime and one sample from the shoes of each of the five suspects. Determine if any of the five suspect samples match the crime scene sample by analyzing their general appearance, acidity, and particle size of the soils.
Background
The Science
Soils from different areas vary widely in their composition. You cannot always tell different types of soil apart by simple visual examination of their gross appearance (what is visible to the naked eye). However, complex tests involving x-rays and other sophisticated instruments aren’t always needed when examining physical evidence like soil.
Instead, as soil technicians, we’ll observe characteristics under different lighting -- direct, ultraviolet, and polarized -- under a microscope before and after drying, identify acidity levels, and determine particle size in order to analyze these soil samples.
In This Investigation...
In this investigation, you will carry out the following examinations:
- Compare general appearance of soils under direct light, ultraviolet light and polarized light before drying.
- Compare general appearance of soils under direct light, ultraviolet light and polarized light after drying.
- Compare soil acidity.
- Compare particle sizes by using sieves.
Soil Science
General Appearance
When comparing different samples of soil, dust, or mud, you should identify as many similarities as possible between the samples in order to determine a match.
Comparing the color and texture of the soil samples to the crime scene sample will give us a lot of information.
Color
Based on the Munsell system of color classification, the Munsell Soil Color Charts are used to compare soil color based on:
- hue (a specific color),
- value (lightness and darkness), and
- chroma (color purity/intensity).
Soil color often indicates that substances, like minerals, are present. For example:
- If a soil is white or gray, it may contain lime (calcium oxide or CaO) or quartz.
- Iron may be present in soils with red, brown, and yellow tones.
- Dark gray and black soils are either rich in organic materials or have a high moisture content.
Important: The color of soil is darker when it is wet, so compare colors always after the samples are uniformly dried.
Size/Texture
The size and particle types determine the overall texture of a soil. Soil particles are described as:
- Clay: a fine-grained, small particle sized earth material of the soil with a diameter less than 0.002 mm; clay is soft and flexible when wet, but hard when dry
- Sand: a loose granular material (particle size 0.05mm - 2.0 mm) derived from the disintegration of rocks
- Silt: fine soil particles between the size of sand and clay (roughly 0.05mm-.002mm) which are deposited as sediment
Soil may be made of sand, silt, or clay in a variety of compositions. These terms are used to classify the particles within the soil based on their size.
There are 12 major classes of soil defined by their percentage of sand, silt, and clay, as shown on the Soil Textural Triangle (below).
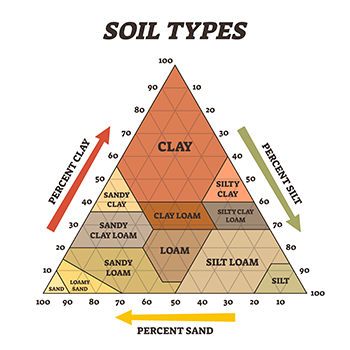
Rather than using a ruler or caliper to measure individual particles, you can separate out the coarser bits from the finer particles using a set of sieves.
Then, see how much of each type of particle makes up the sample to determine the type of soil from its components.
Other Visual Considerations
When examining forensic evidence, you should always make note of unusual materials or vegetation in the sample.
This might include leaves, roots, pine needles, hair, metal specks, fibers, building materials, and/or gum wrappers.
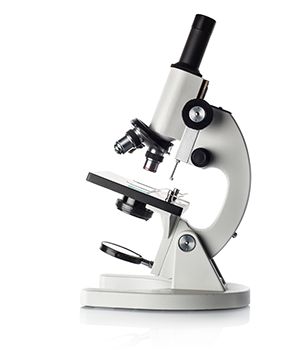
Microscope and Lighting
In addition to viewing the samples with the naked eye, you can also view them under a microscope and in certain light.
- Observing soil samples under a microscope in normal lighting conditions, or direct light, allows you to see their general appearance characteristics more closely.
- Viewing the samples under a microscope under polarized light, which is light with waves of vibrations occurring only in a single plane, may show birefringence. Under polarized light, some minerals may appear to glow different colors, such as turquoise, iridescent orange, pink, etc.
- Another method involves viewing samples under a microscope in UV light. Ultraviolet light has wavelengths from 400 nanometers to 100 nm, meaning it is on the electromagnetic spectrum between visible light and x-rays. Some particles, like glass, will fluoresce, or glow, under UV light.
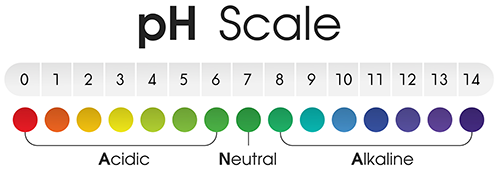
Acidity
The composition of the soil, as well as the drainage conditions in the area, will affect the acidity of the soil. For example, the presence of lime will make a soil more basic, while the presence of sulfates or nitrates will make a soil more acidic. Acidity is measured using the pH scale.
- A pH of less than 7 indicates an acidic soil.
- A soil sample with pH above 7 is basic.
- Neutral soils will have a pH of 7.
You can determine the pH of a soil sample using a universal indicator, which changes colors to indicate pH.
Knowledge Check #1
Match the name of the test to the tool that is best used for it.
Test types:
- Acidity
- Close-up Appearance
- Particle Size
Tools:
Microscope 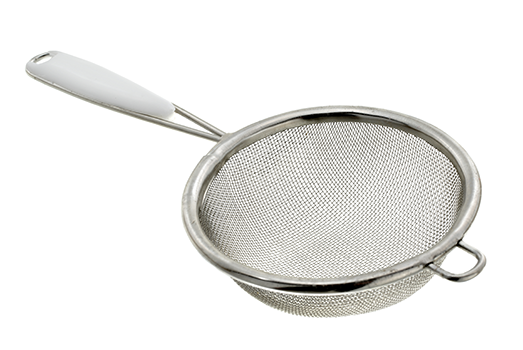
Sieve -
pH scale
Answers:
- Acidity: pH scale
- Close-up Appearance: microscope
- Particle Size: sieve
Link to Case
Your job is to determine whether any of the five soil samples match the sample collected from the victim by analyzing:
- their general appearance (using direct light, ultraviolet light and polarized light),
- acidity, and
- composition.
Reflection
Are soil samples considered class or individual evidence? How can they be used in an investigation?
Experiment #1
Experiment #1: General Appearance of Soil Samples before Heating
To compare the properties of the soil samples to the crime scene sample, we will observe each sample under direct, polarized, and ultraviolet light, prior to drying.
You will complete the process for all six samples under 1 lighting condition and record your observations on your lab report, before moving on to the next lighting condition.
The Equipment
Use this equipment to complete Experiments #1 and #2 and observe each soil sample under direct, polarized, and ultraviolet light (before and after heating).
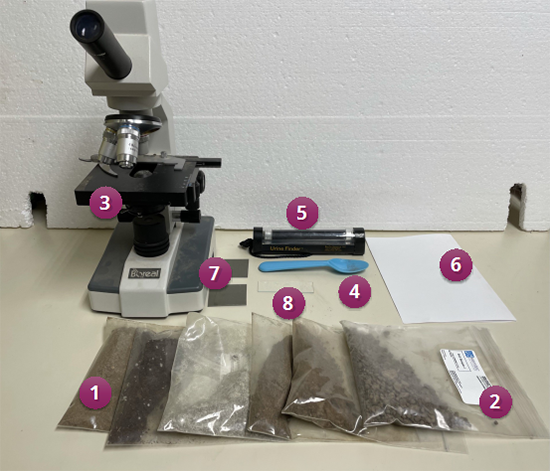
- Soil samples (F - J)
- Crime scene soil sample
- Microscope
- Plastic spoons
- Ultraviolet light
- White Paper
- Polarized film set
- Microscope Slides
Process: Direct Light Before Heating
To view the soil before heating using direct light:
- Put on gloves.
- Place a sample of each soil on white paper.
- Observe the color and texture of each sample.
- Note the presence of vegetation or other components.
- Record your observations.
- Place a small amount of the crime scene soil on a microscope slide.
- View the sample under a microscope.
- Note any unique observations including any unusual materials.
- Record your observations on the lab report in the “Before Heating” column.
- Repeat the above steps for soil samples F-J.
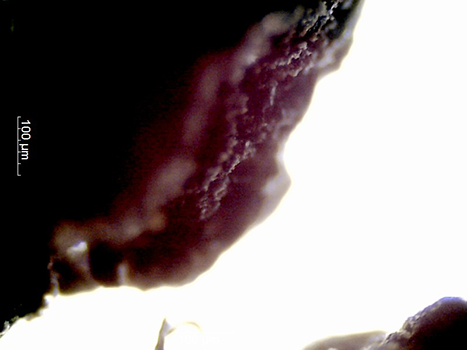
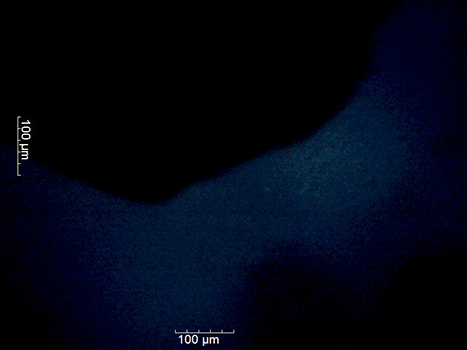
Viewing the Evidence: Direct Light
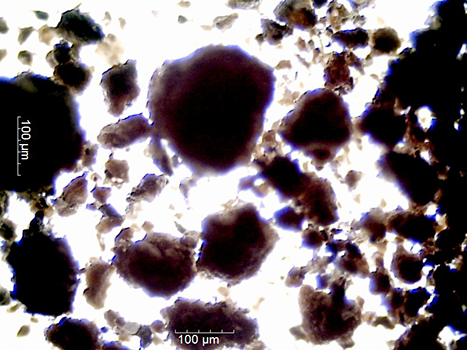
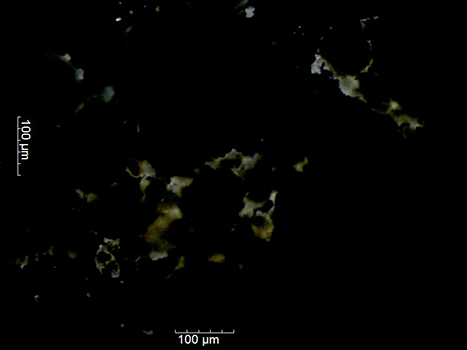
Record each sample’s general appearance (color, texture, vegetation, etc.) on your lab report. Need help? Review the Soil Science section above!
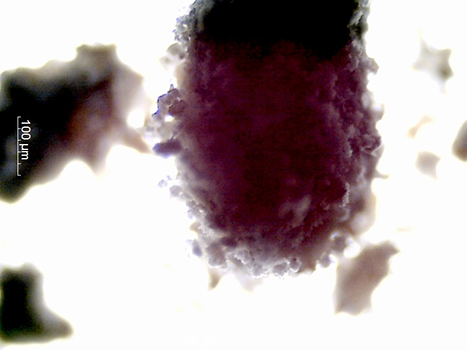
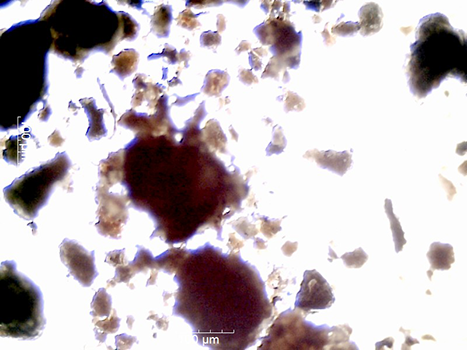
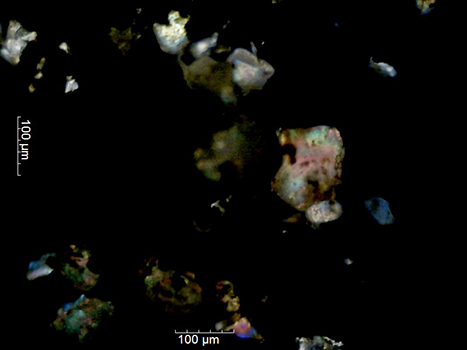
Crime Scene:
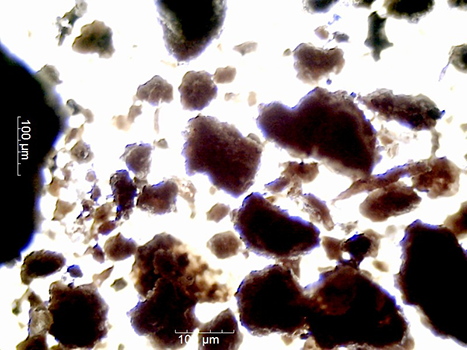
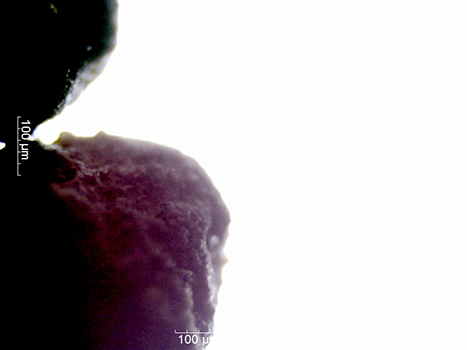
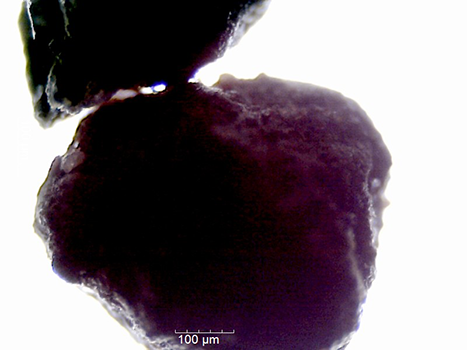
Open Crime Scene Sample - Before Heating - Under a Microscope in a new tab
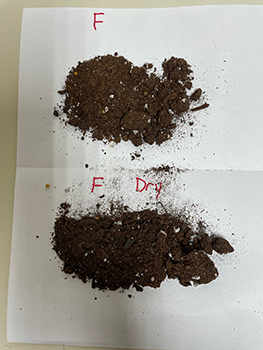
Sample F
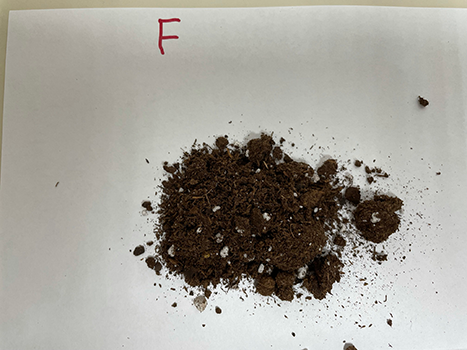
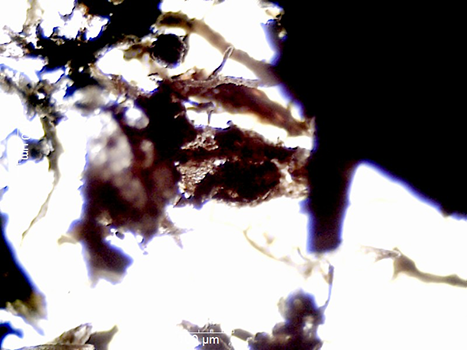
Open Sample F - Before Heating - Under a Microscope in a new tab
Sample G

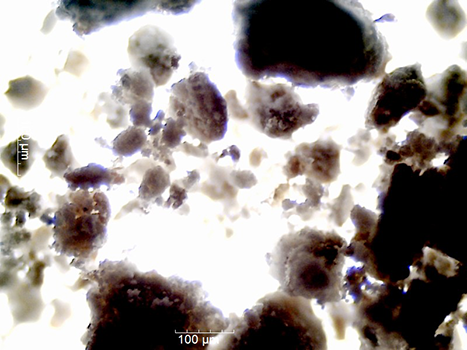
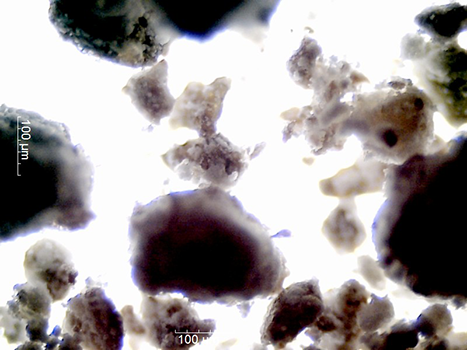
Open Sample G - Before Heating - Under a Microscope in a new tab
Sample H
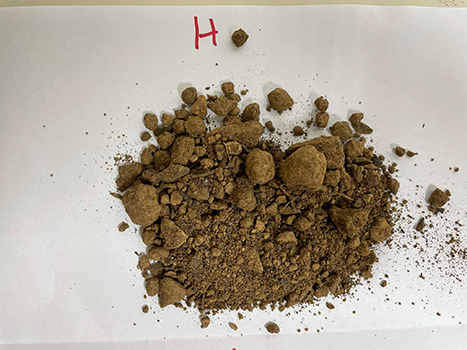
Open Sample H - Before Heating - Under a Microscope in a new tab
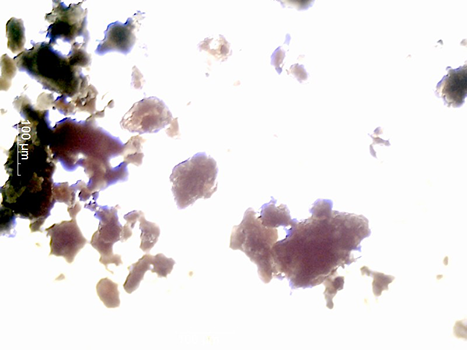
Sample I
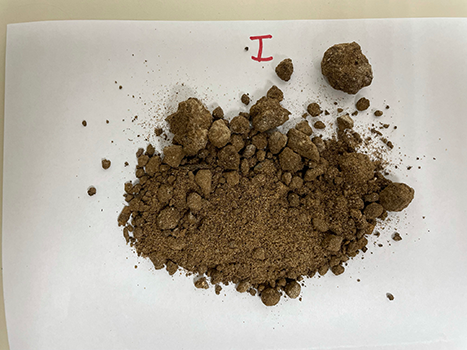
Open Sample I - Before Heating - Under a Microscope in a new tab
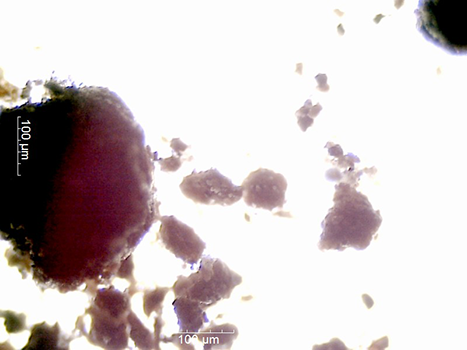
Sample J
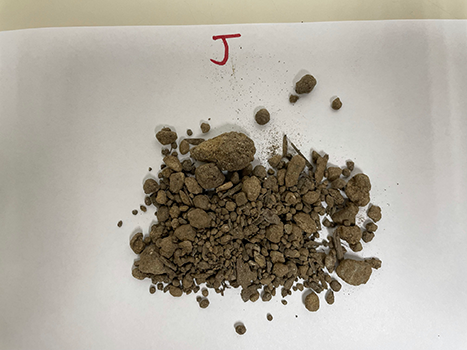
Open Sample J - Before Heating - Under a Microscope in a new tab
Process: Polarized Light Before Heating
To view the soil before heating using polarized light:
- Observe a thin dry layer of the crime scene soil under the microscope between the two polarized films.
- One film should be placed over the light source.
- The other film should be placed between the sample and the objective lens.
- One film should be positioned permanently while the other one is rotated.
- As you rotate the film, more and more of the light is blocked.
- Some minerals will appear to glow different colors (turquoise, iridescent orange, pink, etc.) as the polarized film is rotated.
- This is called birefringence.
- Record all of your observations on the lab report in the “Before Heating” column.
- Repeat the above steps for soil samples F-J.
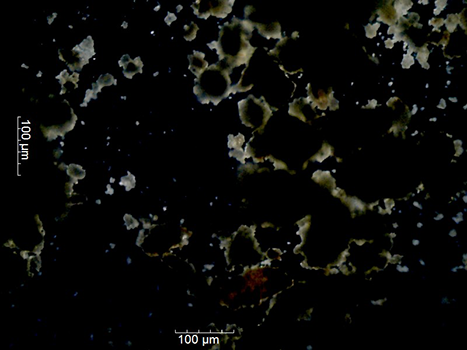
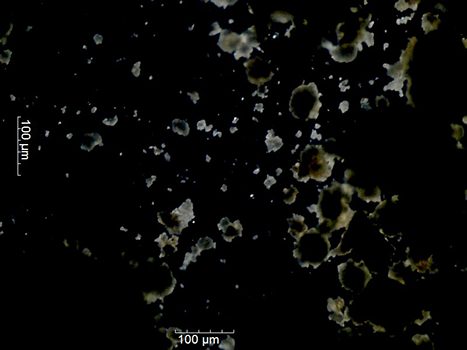
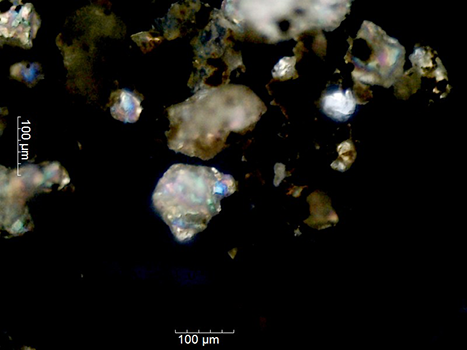
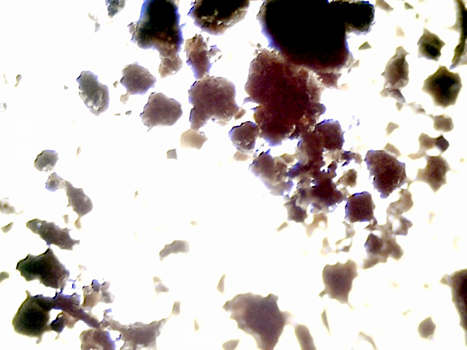
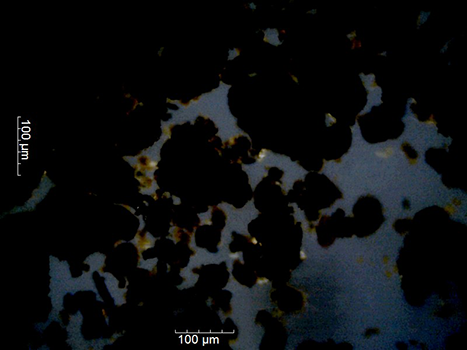
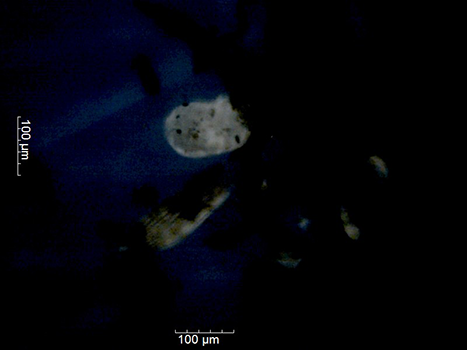
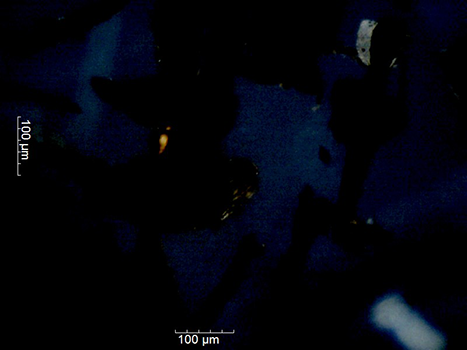
Viewing the Evidence: Polarized Light
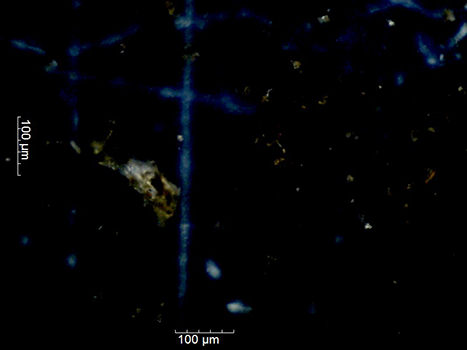
Observe each sample under polarized light, noting any birefringence on your lab report. Need help? Review the Soil Science section above!
Crime Scene
Sample F
Sample G
Sample H
Sample I
Sample J
Process: Ultraviolet Light Before Heating
To view the soil before heating using polarized light:
Caution: Do not look directly at the ultraviolet light or shine it into the eyes of others; this can cause harm to eyes! Only shine the light directly on the samples.
- Shine ultraviolet light on the crime scene sample and once again note the color, texture, or presence of any unusual materials.
- Can you detect the presence of any unique materials?
- Some particles, like glass, will fluoresce under ultraviolet light
- Record all of your observations on the lab report in the “Before Heating” column.
- Repeat the above steps for soil samples F-J.
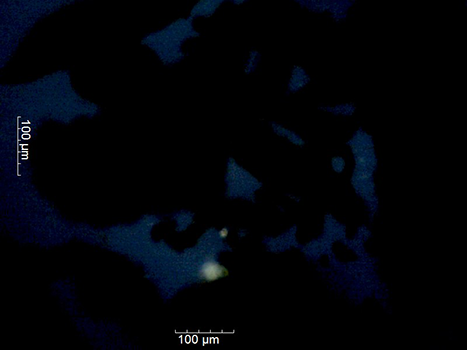
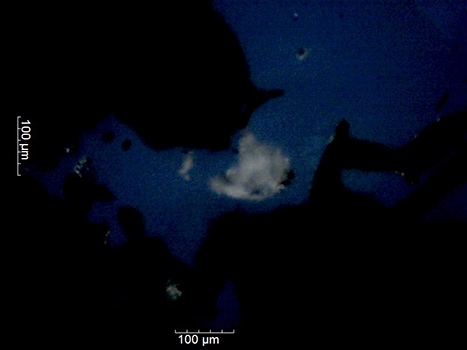
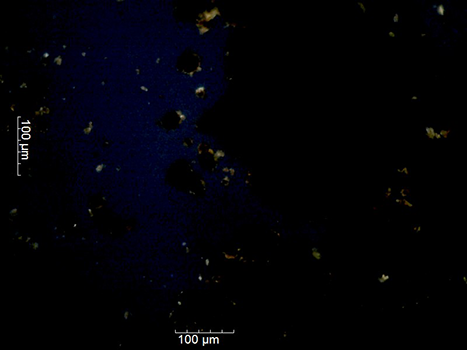
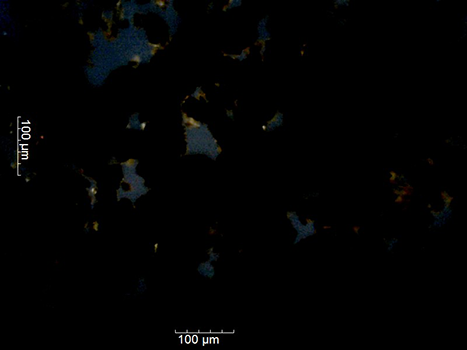
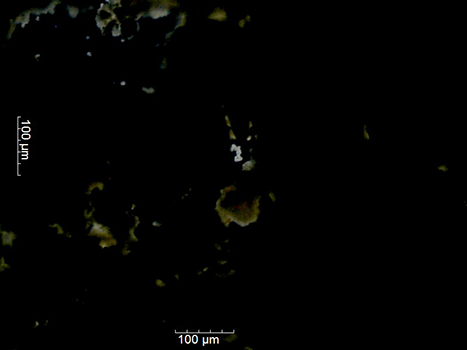
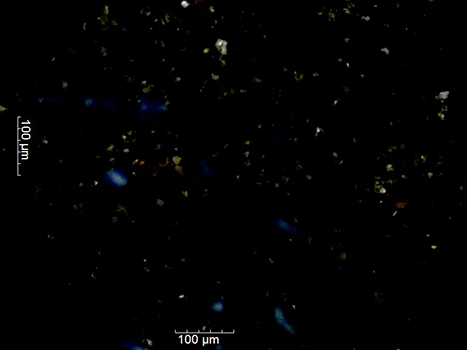
Viewing the Evidence: UV Light
Record the color, texture, fluorescing particles, etc. of each sample on your lab report. Need help? Review the Soil Science section above!
Crime Scene
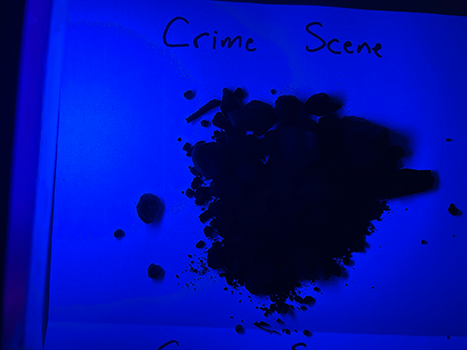
Open Crime Scene Sample - Before Heating - Under UV Light in a new tab
Sample F
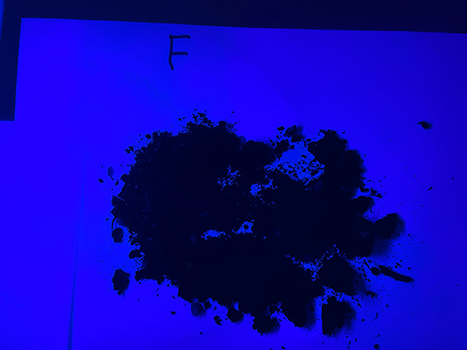
Open Sample F - Before Heating - Under UV Light in a new tab
Sample G
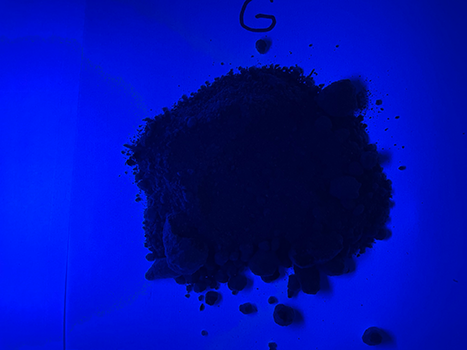
Open Sample G - Before Heating - Under UV Light in a new tab
Sample H
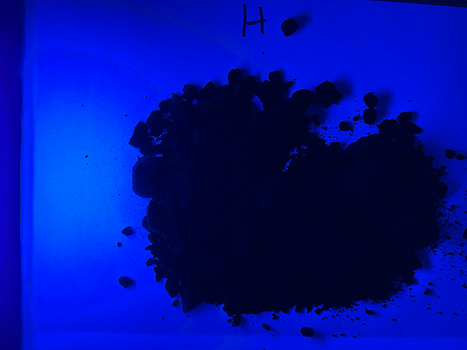
Open Sample H - Before Heating - Under UV Light in a new tab
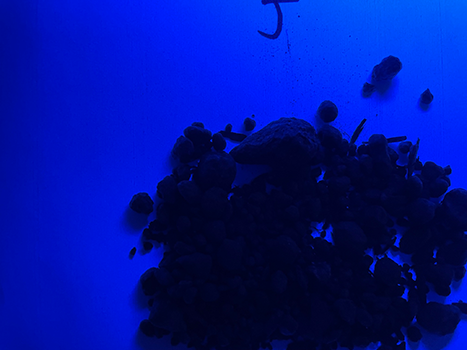
Sample I
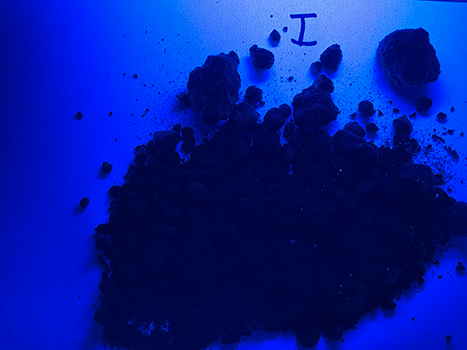
Open Sample I - Before Heating - Under UV Light in a new tab
Sample J
Open Sample J - Before Heating - Under UV Light in a new tab
Analysis: Experiment #1
Review your observations of the soil samples under the three types of light on your lab report.
- Do any of the samples have similar characteristics to the crime scene sample?
- Could they have come from the same site?
Experiment #2
Experiment #2: General Appearance of Soil Samples after Heating
Next, we are going to dry all of the soil samples and assess their appearance. We must fully dry the samples before making any final, visual color comparisons, as the more water a sample contains, the darker it will appear in color.
We’ll ensure each sample is dry by adding each sample a makeshift tray of aluminum and heating in a 105-degree oven for 3-5 minutes. After drying, we will observe them under different light conditions again.
Process: Drying the Soil Samples
Steps:
To dry the soil samples in the oven:
- With gloved hands, put each soil sample into a 3” × 3” piece of aluminum foil that’s been turned up on the sides to form a tray.
- Place the samples in an oven set at 105° C (221°F) for about 3-5 minutes.
- Safely remove the samples from the oven. Allow them to cool to room temperature.
Watch the samples being put in and removed from the oven.
Open Putting Samples in the Oven in a new tab
Open Removing Samples from the Oven in a new tab
Process continued: Observing the Dried Samples
To observe the dried soil samples under different types of lighting:
- Observe each of the dried soil samples under direct, polarized, and ultraviolet light using the same method as used in Experiment #1.
- Record your observations on the lab report in the “After Heating” columns for each soil sample.
- Did any of the samples change in color after heating?
- If a sample appears the same after heating as it did before, write "no change" in the appropriate space on the worksheet.
- Keep the dried samples to use in the next experiment.
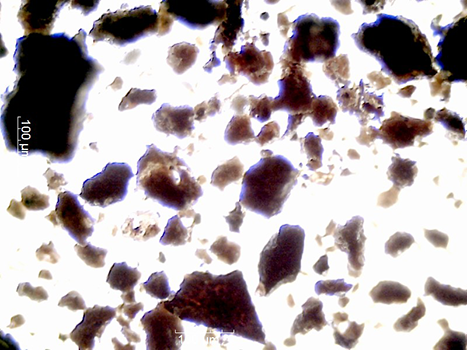
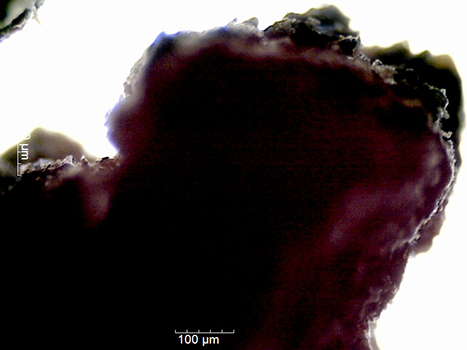
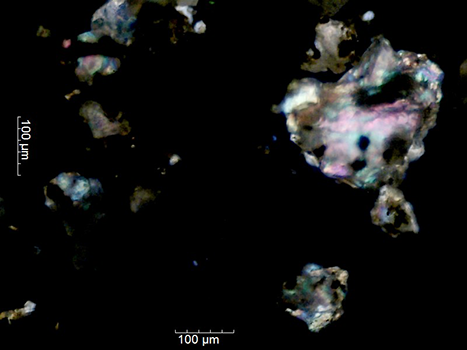
Viewing the Evidence: Direct Light
Record each sample’s general appearance (color, texture, vegetation, etc.) on your lab report after heating. Write “no change” if the same.
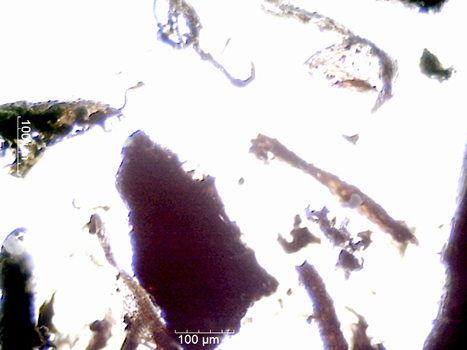
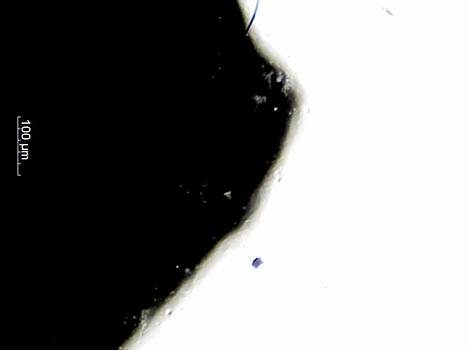
Crime Scene
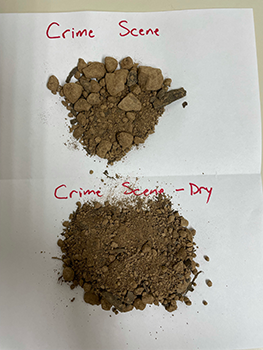
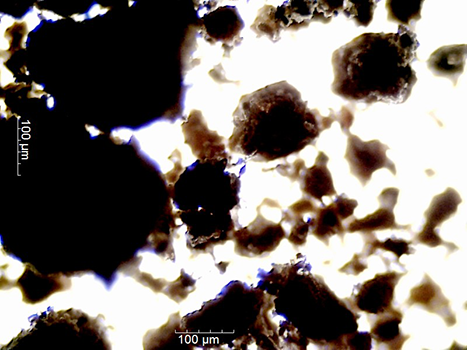
Open Crime Scene Sample - Dry - Under a Microscope, 4x Magnification in a new tab
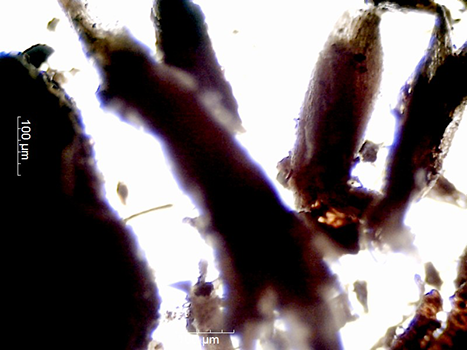
Sample F
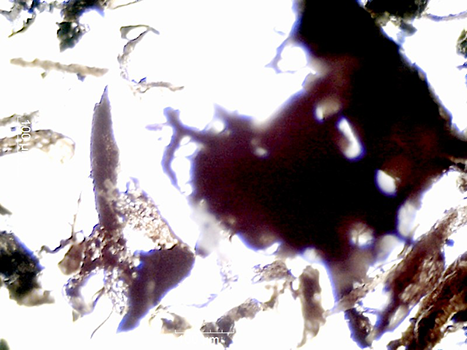
Open Sample F - Dry - Under a Microscope, 4x Magnification in a new tab
Sample G
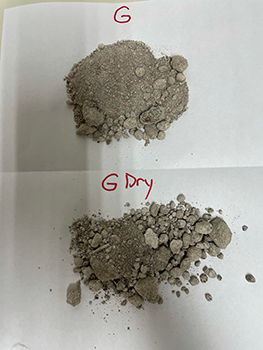
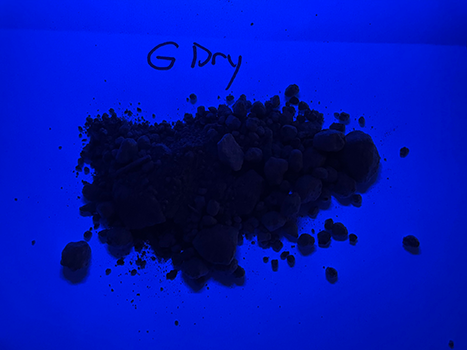
Open Sample G - Dry - Under a Microscope, 4x Magnification in a new tab
Sample H
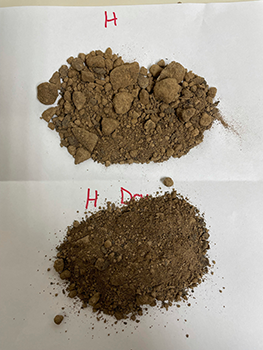
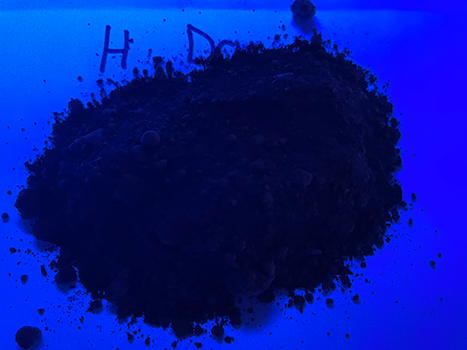
Open Sample H - Dry - Under a Microscope, 4x Magnification in a new tab
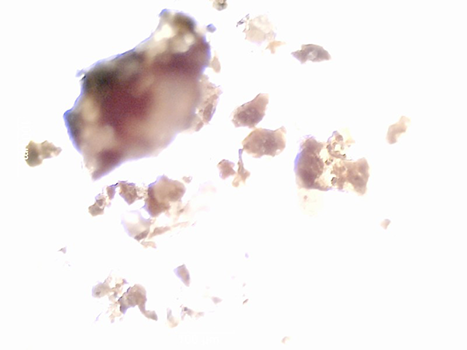
Sample I
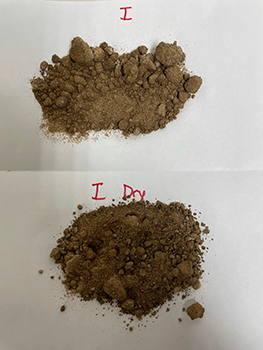
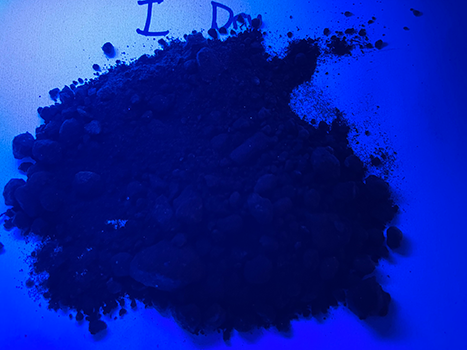
Open Sample I - Dry - Under a Microscope, 4x Magnification in a new tab
Sample J
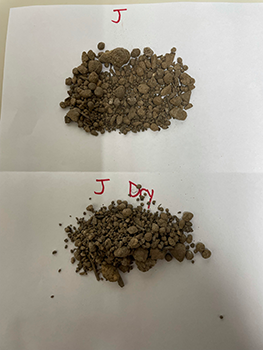
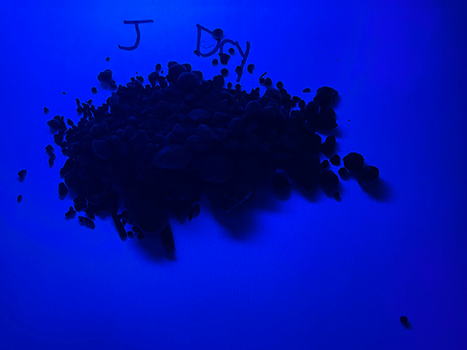
Open Sample J - Dry - Under a Microscope, 4x Magnification in a new tab
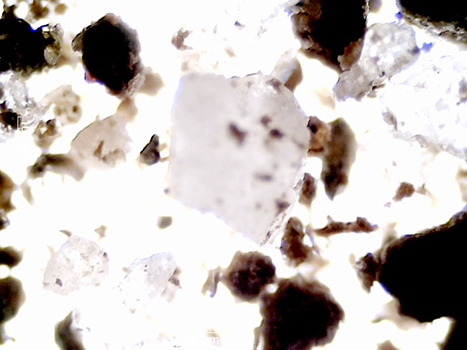
Viewing the Evidence: Polarized Light
Observe each sample under polarized light, noting any birefringence on your lab report after heating. Write “no change” if the same.
Crime Scene
Open Crime Scene Sample - Dry - Under a Microscope - Polarized Light in a new tab
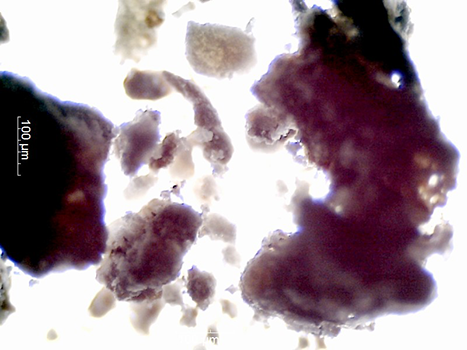
Sample F
Open Sample F - Dry - Under a Microscope - Polarized Light in a new tab
Sample G
Open Sample G - Dry - Under a Microscope - Polarized Light in a new tab
Sample H
Open Sample H - Dry - Under a Microscope - Polarized Light in a new tab
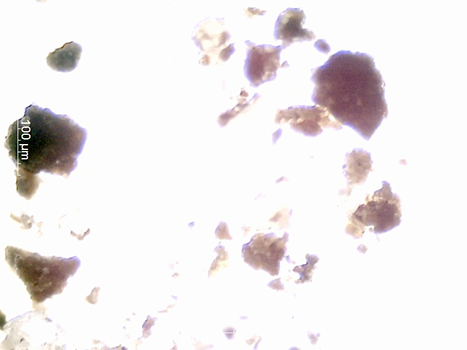
Sample I
Open Sample I - Dry - Under a Microscope - Polarized Light in a new tab
Sample J
Open Sample J - Dry - Under a Microscope - Polarized Light in a new tab
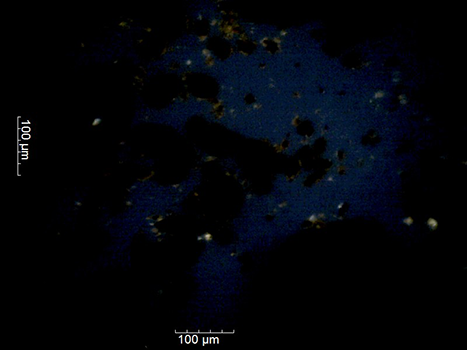
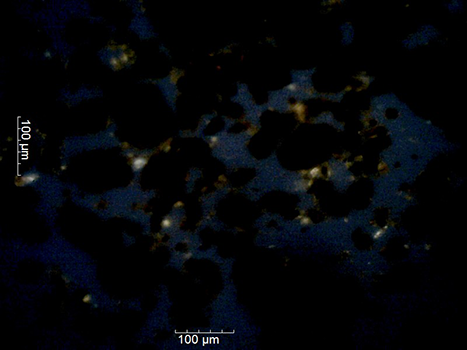
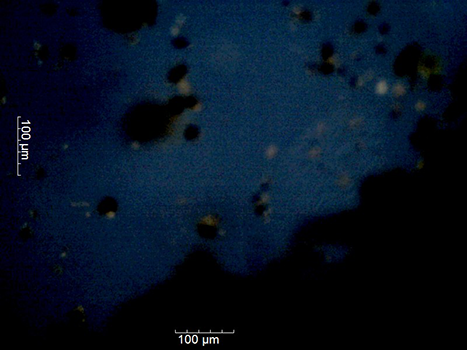
Viewing the Evidence: UV Light
Record the color, texture, fluorescing particles, etc. of each sample on your lab report after heating. Write “no change” if the same.
Video (CS, F, G)
Open Crime Scene Sample, Sample F, and Sample G - Dry - Under UV Light in a new tab
Video (H, I, J)
Open Sample H, Sample I, and Sample J - Dry - Under UV Light in a new tab
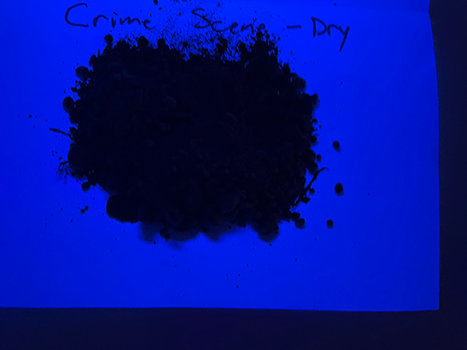
Crime Scene
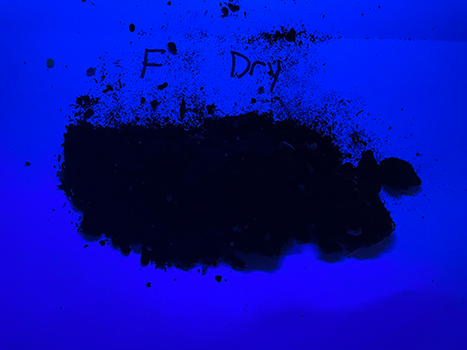
Sample F
Sample G
Sample H
Sample I
Sample J
Analysis: Experiment #2
Look at your lab report and compare your notes between the “Before Heating” and “After Heating” columns for each lighting type for each soil sample.
Did any of the samples change in color after heating? Remember, if you didn’t see a change in color after heating the sample, indicate “no change” on your report.
Experiment #3
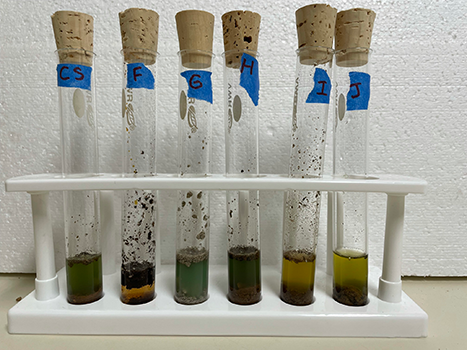
Experiment #3: Acidity of Soil Samples
To test the acidity of the soil samples, we’ll use a spatula or scoop to remove a small amount of each soil sample and place it into a test tube.
Adding distilled water and the universal indicator will allow us to determine the pH of the solution via its color.
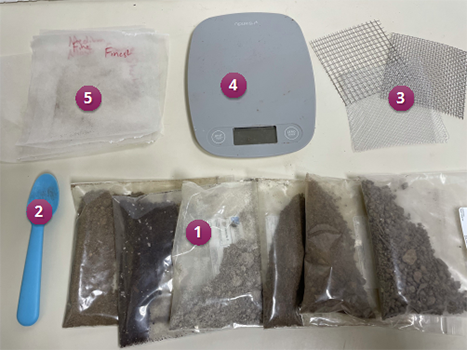
Equipment
Use this equipment to complete Experiment #3 and determine the pH of each sample.
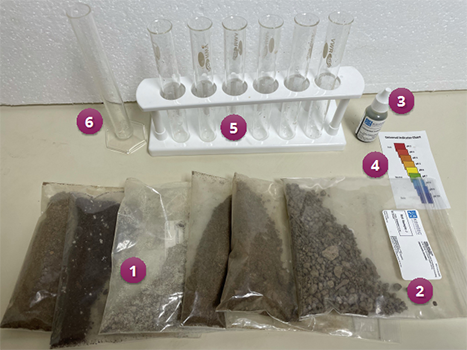
- Soil samples (F - J)
- Crime scene soil sample
- Universal indicator solution
- Universal indicator color chart
- 6 test tubes
- Graduated cylinder
Not pictured:
- Plastic spoon
- Distilled water
- Gloves
Process
To determine the acidity of a soil sample:
- With gloved hands, scoop a small amount (1-2 grams) of the crime scene soil into a test tube.
- Use the graduated cylinder to measure out 5 ml of distilled water. Add the water to the test tube.
- Place your thumb tightly over the open end of the test tube and shake it five times. Allow the particles to settle.
- Add 5 drops of universal indicator and stir.
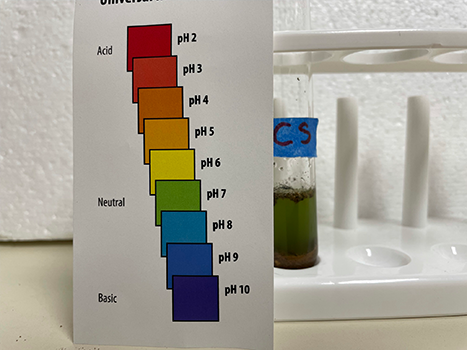
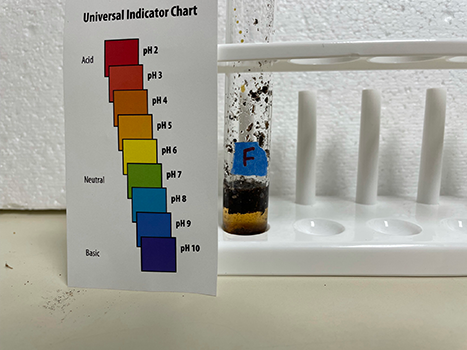
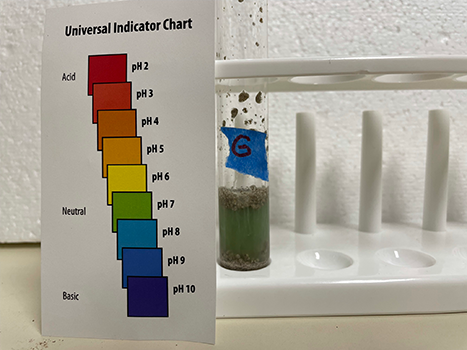
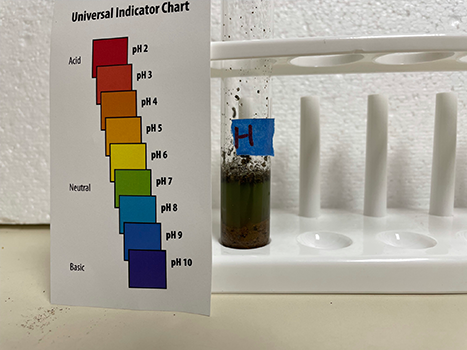
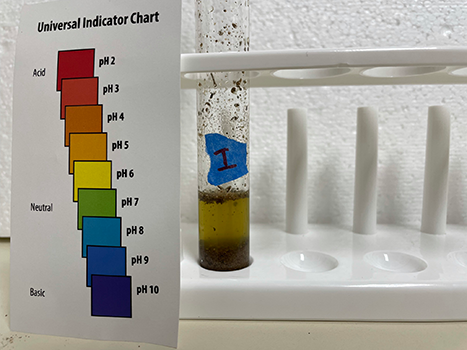
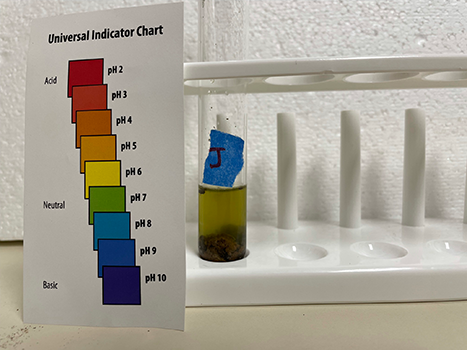
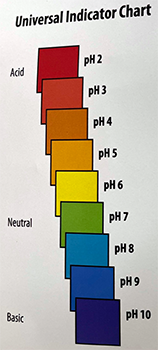
- Compare the color of the solution to the colors on the universal indicator color chart. Record the color observed and the approximate pH on the student worksheet.
- Determine whether a soil sample was acidic (A), basic (B), or neutral (N) by analyzing the observations on the worksheet. Record your conclusions on the student worksheet.
- Repeat Steps 1-5 for the five soil samples F - J.
Watch the video Experiment #3 Process.
Open Experiment #3 Process in a new tab
Viewing the Evidence
Compare each sample to the colors on the universal indicator chart.
Determine whether a soil sample is acidic (A), basic (B), or neutral (N) and record your conclusions.
Analysis: Experiment #3
Determine which samples have similar acidity. Could these samples have come from the same location?
On your lab report, eliminate the samples that clearly have properties that differ from the crime scene evidence.
Experiment #4
Experiment #4: Range of Particle Sizes of Soil Samples
The composition of a soil not only determines the color and texture of the soil but also the range of particle sizes.
If two samples came from the same location, they should have a similar range of particle sizes.
Equipment
Use this equipment to complete Experiment #3 and determine the pH of each sample.
- Dried soil samples (F - J) and crime scene sample
- Plastic Spoon
- Set of Sieves
- Balance
- 18 waxed paper squares, 5” x 5”
Not pictured:
- Distilled water
- Gloves
Process
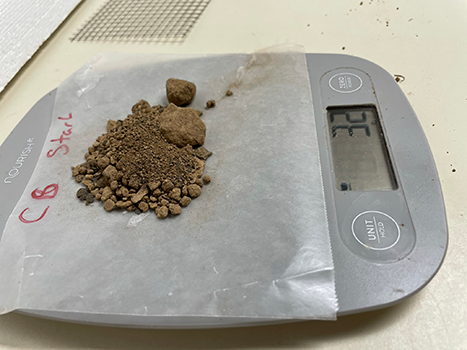
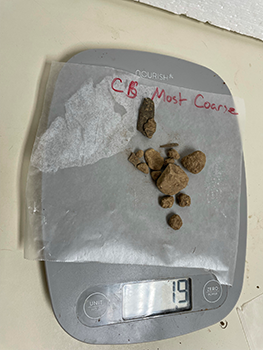
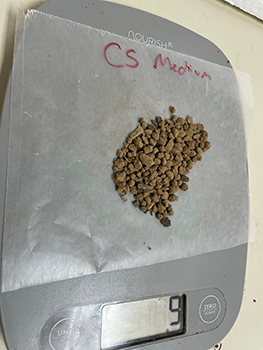
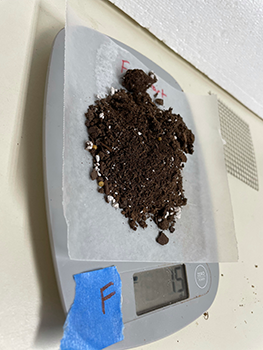
To determine the range of particle sizes in a soil sample:
- With gloved hands, weigh out 10 g of soil from the crime scene sample.
- Place the soil on the coarsest sieve, allowing the particles to fall through onto a square of waxed paper. You may have to stir the soil a little, or gently shake the sieve.
- Weigh the soil (if any) that remains on top of the sieve.
- Record the mass in your worksheet.
- Describe the sample.
- Label this piece of waxed paper “crime scene - largest size”.
- Place the remaining soil that went through the largest sieve onto the medium sieve, allowing the particles to fall through onto a square of waxed paper.
- Weigh the soil that remains on the top of the sieve.
- Record the mass in your worksheet.
- Describe the sample.
- Label this piece of waxed paper “crime scene - medium size”.
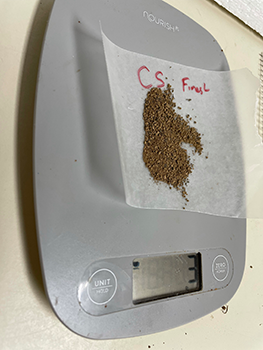
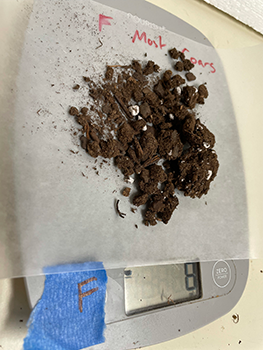
- Place the remaining soil that went through the medium sieve onto the fine sieve, allowing the particles to fall through onto a square of waxed paper.
- Weigh both the soil that remains on the top of the sieve and the soil that passes through the sieve.
- Record both of these masses in the proper space in your worksheet.
- Describe each sample.
- Save the sample, pouring it back into its original bag.
- Repeat steps 1-11 for soil samples F-J.
Open Experiment #4 Process in a new tab
Viewing the Evidence
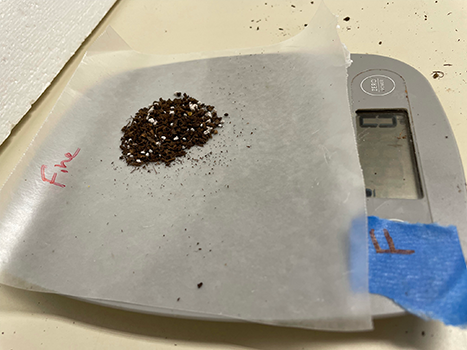
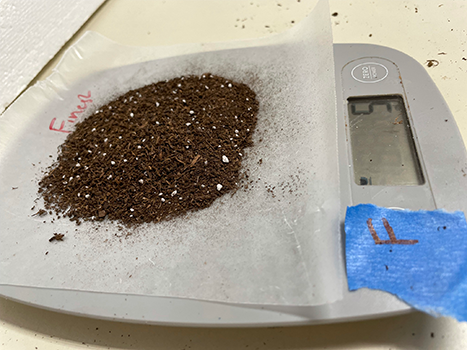
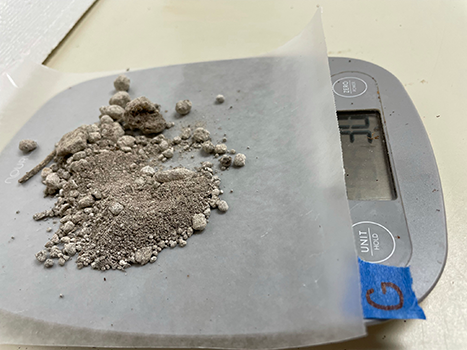
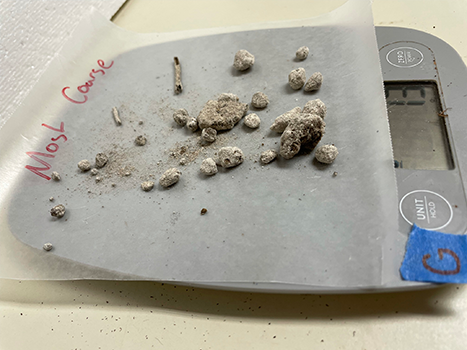
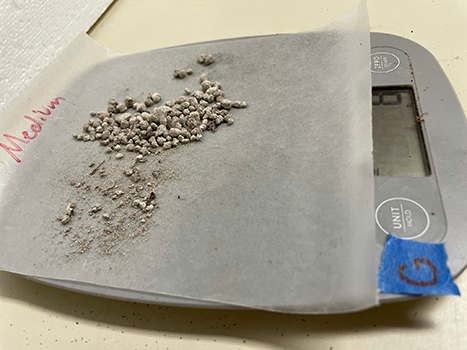
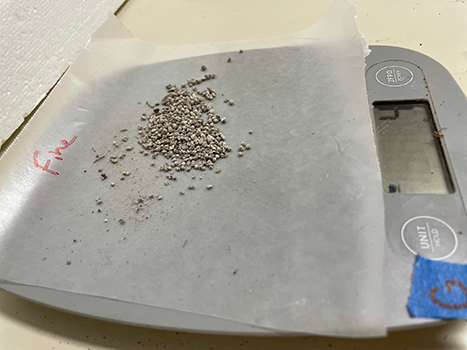
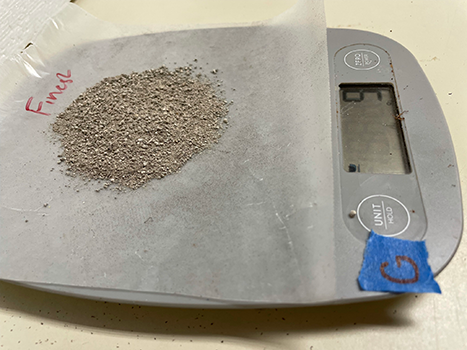
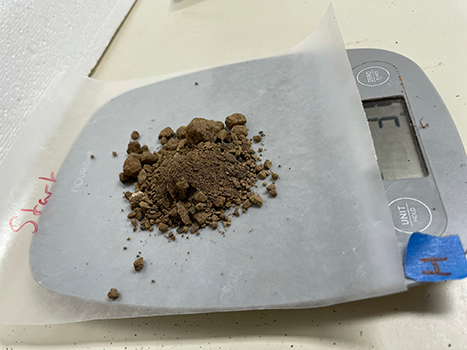
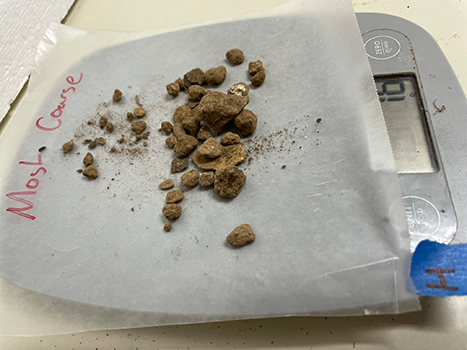
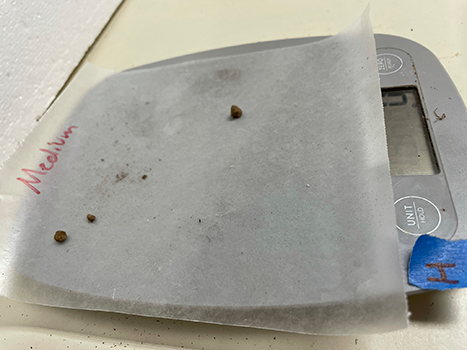
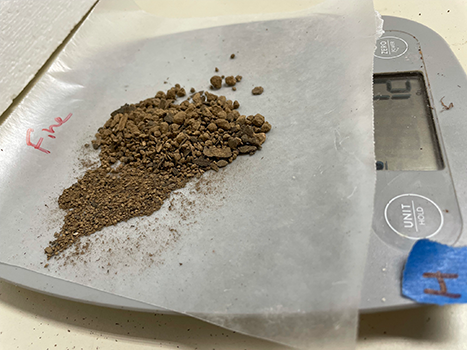
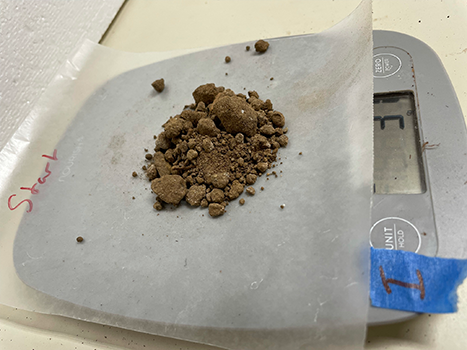
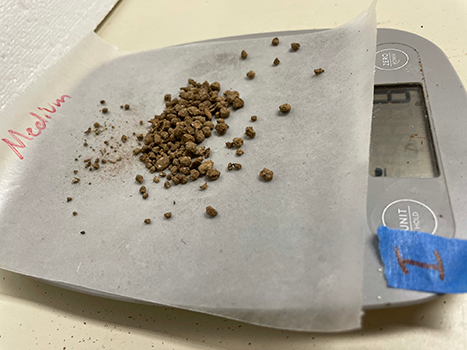
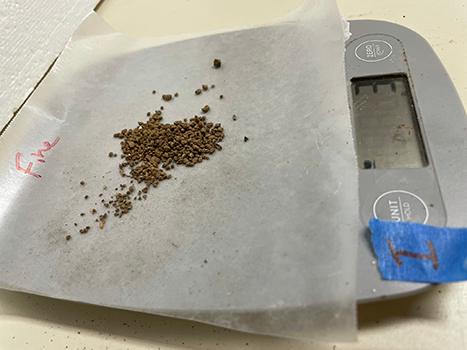
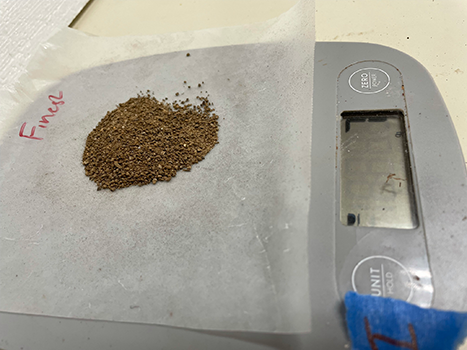
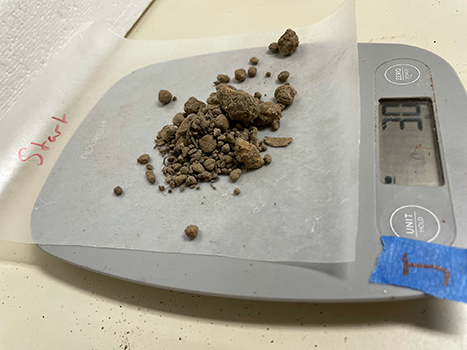
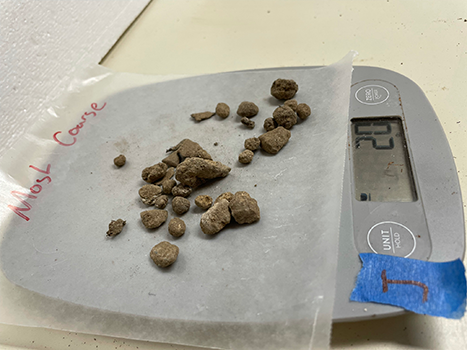
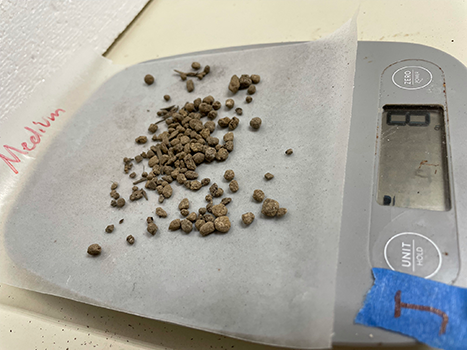
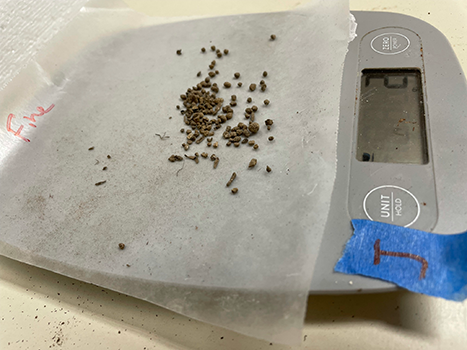
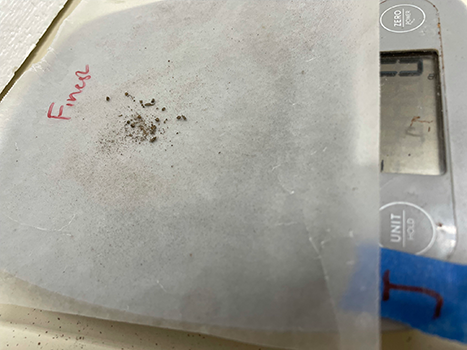
Review each sample’s particle ranges, record the mass in grams on your report, and rate the relative amount of each of the particle ranges.
Compare the particle ranges of each sample. Rate the particle ranges (most coarse, medium, fine, and finest) on a scale of 1-4 scale, with:
1 = the particle range which contained the least amount of soil
4 = the particle range which contained the greatest amount of soil
Crime Scene

Sample F

Sample G
Sample H

Sample I

Sample J
Analysis: Experiment #4
Which soil samples have the same relative size ranges?
Does it appear that these samples could have come from the same location?
Which samples can you exclude as having different soil particle sizes from the crime scene sample?
On your lab report, eliminate the samples that clearly have properties that differ from the crime scene evidence.
Conclusion
Lab Analysis
You’ve completed all four experiments on the five soil samples from the suspects and the crime scene soil sample.
Look at all of your collected data and the preliminary analysis completed after each experiment, including where you were able to eliminate samples that clearly differed from the “crime scene” sample evidence.
Which soil samples “F” through “J” are remaining?
Which samples, if any, can you eliminate completely?
Which sample(s) are likely to be from the same location as the crime scene sample?
Remember to complete your lab report! Your findings will be shared with law enforcement and used, in part, to resolve or move this case forward.