Learn
The 7 S's of Crime Scene Investigation
Every single crime scene is different. Some crime scenes are outside, while others are inside. Some crimes occur in homes, while others occur in public places, and some even occur virtually. While special consideration must be taken for the specifics of the scene, there are some basic steps that law enforcement and crime scene investigators follow each time. These are known as the 7 S's of crime scene investigation.
- Secure the Scene
- Separate the Witnesses
- Scan the Scene
- See the Scene
- Sketch the Scene
- Search for Evidence
- Secure and Collect Evidence
1. Secure the Scene
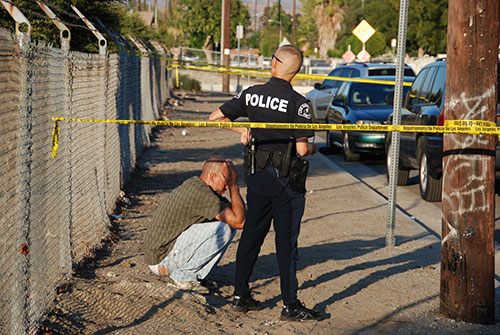
The first officer to arrive at the scene should secure the scene by making sure that everyone in the area is safe and isolate the area to preserve evidence. This may include arresting suspects and obtaining medical assistance.
Crime scene tape, like that shown below, is often used to help secure the scene.

2. Separate the Witnesses
Witnesses should be separated from one another. What is the purpose of this separation?
Answer: To keep them from working together to create a cover story and/or share details about the situation with one another.
3. Scan the Scene
This step gives investigators an overall picture of the scene. They will identify the primary crime scene, or where the crime took place. If applicable, they'll identify area(s) related to the crime but not where the crime took place, or the secondary crime scene.
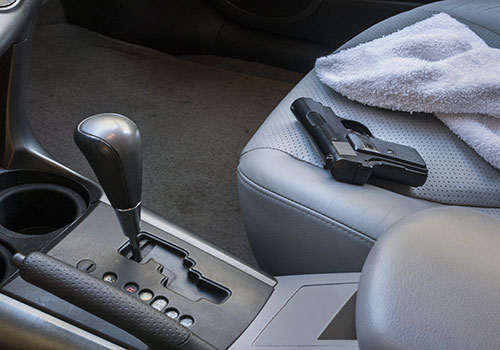
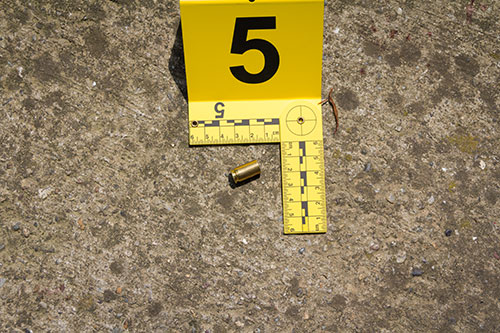
A photography unit will take pictures of items identified during the initial scan. Pictures should be taken of the overall area, as well as close-ups, using evidence markers or a ruler for size reference. A sketch of the scene is created in such a way that investigators could recreate the crime scene at an alternate location. The sketch includes objects in the room and the location of evidence, as well as directional north, the date, time, location, and case number. A thorough search is conducted to identify any evidence that may have been overlooked in the previous steps. This search can occur in several patterns. One is chosen by the lead investigator. All identified evidence must be collected and secured using specific techniques and procedures. These techniques keep the evidence from becoming damaged or contaminated. Each piece of evidence is logged onto an evidence log and marked with an evidence label. The label features a chain of custody. Each person that touches the evidence must complete the chain of custody. This is required for the items to be admissible, or acceptable as evidence, in a court of law. Place the steps for crime scene investigation in the correct order. Steps in a Crime Scene Investigation: Answers in the Correct Order: Watch Overview: Processing the Crime Scene (2:08) to see the process in action. We'll visit this staged residential break in with the Tuscaloosa Police Department's Major Crimes Unit (MCU) several times in this course. As you watch, note two ways that they ensure the security of the scene. Also notice how many people are involved, all with different expertise. One person is designated as the lead investigator. Open Overview: Processing the Crime Scene in a new tab The Fourth Amendment prohibits "unreasonable searches and seizures." Therefore, to search for and collect evidence from a primary or secondary crime scene, investigators must apply for and receive a warrant, which is a court order issued by a judge that gives the government the authority to search the place described and to seize the people or things described. If a warrant is necessary but not obtained, investigators will not be able to present that evidence in court or use it in their prosecution of the suspect. That evidence is inadmissible. There are some exceptions to the need for a warrant. Here are some of the situations where a search warrant is not needed: Consider this scenario: While chaperoning a high-school football game, police in Mississippi see a gun on the front seat of a parked car. Can they enter the car and seize the gun without a warrant? Answer: Yes, the gun is in plain view.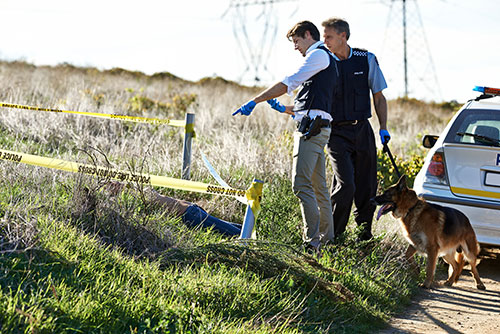
4. See the Scene
5. Sketch the Scene
6. Search for Evidence
7. Secure and Collect Evidence
Knowledge Check #1
Overview of the Process
The Fourth Amendment
Knowledge Check #2